
Binding
What Is Quilt Binding?
Binding is the fabric that covers the raw edges of the quilt sandwich (top, batting and backing). Binding is the last step to complete your quilt.
I usually cut my binding strips 2 ½" to allow for a double layer of fabric while adding binding. You can cut them any width depending on whether you want a narrow or wider binding. You can use one of the fabrics in your quilt or choose something different.
Which Fabric Grain Is Best for Binding?
Usually I cut on the crosswise grain of the fabric. Because the grain of the fabric isn't straight, should damage occur to the binding you would most likely have less damage. The spilt would affect a smaller area of the edge.
Cutting on the crosswise grain has some stretchiness to your fabric. I find this very useful when working with a scalloped border or curved corners.
Sewing binding to your quilt
I use a walking foot to sew on my binding which helps keep puckers out. Attaching your binding in the following manner gives you a mitered corner when folded from the front to the back of the quilt.
I usually trim the quilt sandwich for customers to make it easier for them to just add their binding and the quilt is squared up. If requested I leave about ¼" to ½" backing/batting extending past the edge of the quilt.
I add my hanging sleeve at the same time the binding is sewn to the quilt. I do the hand sewing on the sleeve at the same time I hand sew the binding to the back of the quilt.
Sewing the Binding
I use double folding binding and will give you two methods to join the loose ends of your binding. I like the durability of double folded binding and the looks of the mitered corners.

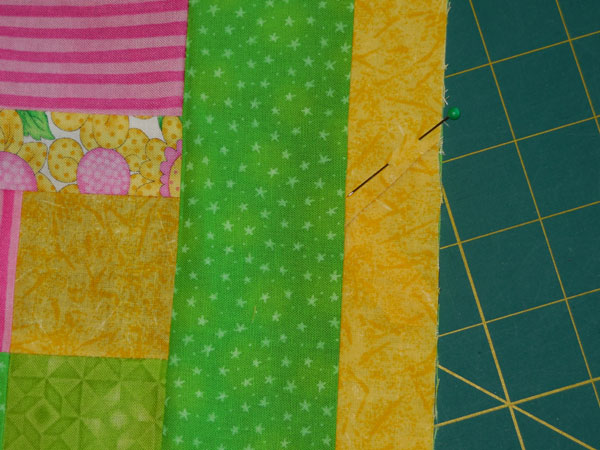
After the binding strips have been sewn together, on the front of your quilt, align the raw edge of your folded binding with the edge of the quilt top.
I leave approximately 6" of the binding unpinned so when I join the ends it is easier to do no matter which method I use. I usually start somewhere in the middle of one side to attach my binding. I do not pint the whole binding strip around the quilt because I am using a walking foot. I match the edge of the binding to the edge of the quilt as I attach the binding to the quilt. I do a quick check prior to sewing to make sure I don't have any seam allowance in corner as there would be too much bulk.
Sew your binding to the side of the quilt. Don't forget to leave about 6" free from the start of your binding and don't forget to pin your sleeve to the quilt if adding one.
I usually use a ¼" seam allowance, so I will stop sewing ¼" from the corner. If you use a different width seam allowance, you would stop that distance before the corner. Following this instruction will give you nicely mitered corners.
Mitered Binding at Corner/Continue Sewing Binding
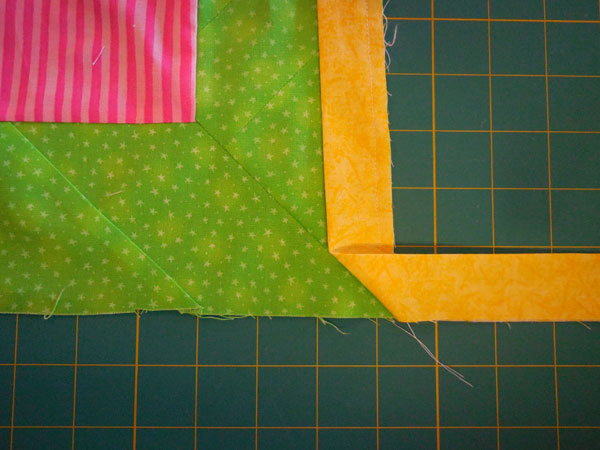
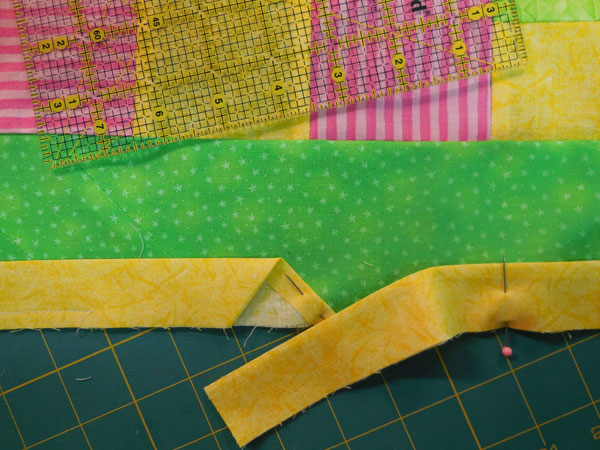
Fold your binding tail straight up so it is parallel with the next side.
Fold the binding down so the fold is flush with the edge of the side. You will have a 45 degree angle of fabric under the fold.
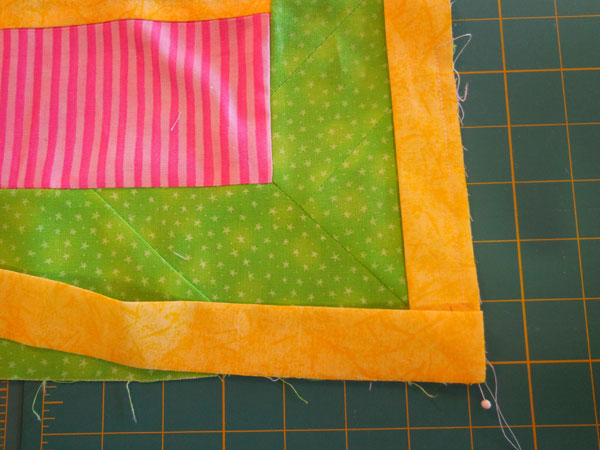
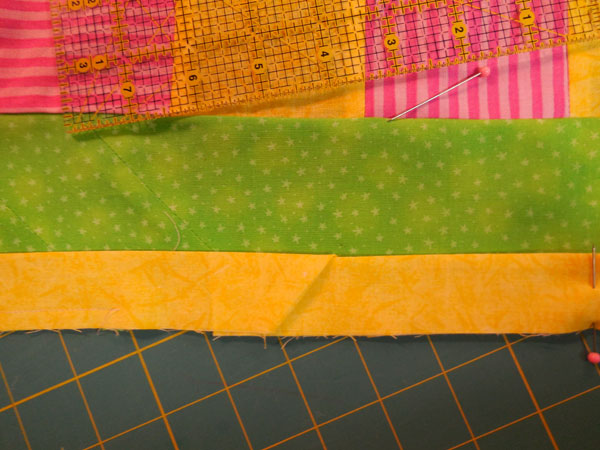
I align my binding with edge of the quilt as I am sewing it to the quilt. Start stitching at the edge of the fold and backstitch to secure. Continue sewing your binding to the side of the quilt.
Repeat these instructions each time you come to a corner.
Join Unsewn Ends of Binding
Diagonal Method
On the last side of your quilt, stop sewing about 6" from where you began. Backstitch to secure.
Overlap the ending binding tail with the starting tail the width of your binding (I used 2½" strips so the overlap would be 2½"). Trim both binding ends with a perpendicular cut.
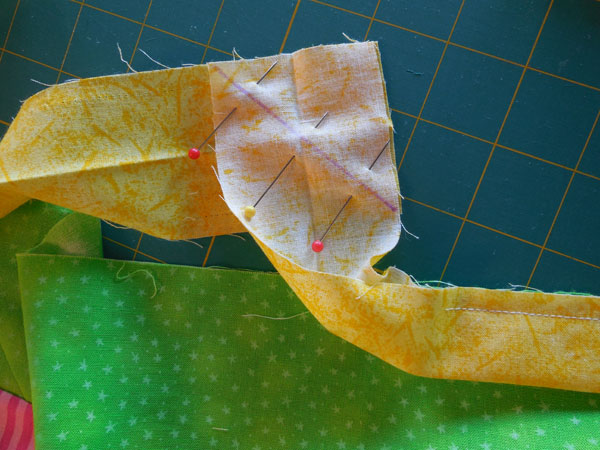
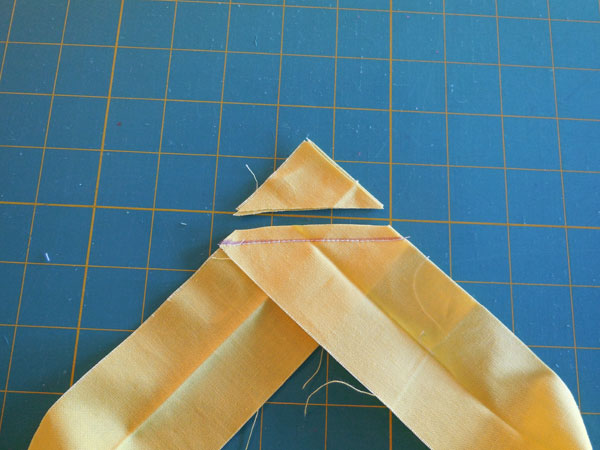
Open up the two ends of the folded binding and place the tails right sides together as shown in photo and draw a diagonal line. Stitch on the line.
Trim the excess corner off and open binding, press seam allowance open and fold in half again while pressing. You will have a diagonal seam on your binding.
Stitch the remaining length down to edge of your quilt.
Tuck-in Method
On the last side of your quilt, stop sewing about 6" from where you began. Backstitch to secure.
Pin the beginning end of your binding with the 45 degree edge to quilt to keep from shifting.
Trim the ending tail of your binding leaving enough length to tuck inside of the beginning end.
Tuck inside and stitch remaining length of binding.
Size troubles?

Take a look here, it may be just what you're looking for.

Block Party
Check out our block of the month!

Ask Riina!
Stuck and not sure what to do?